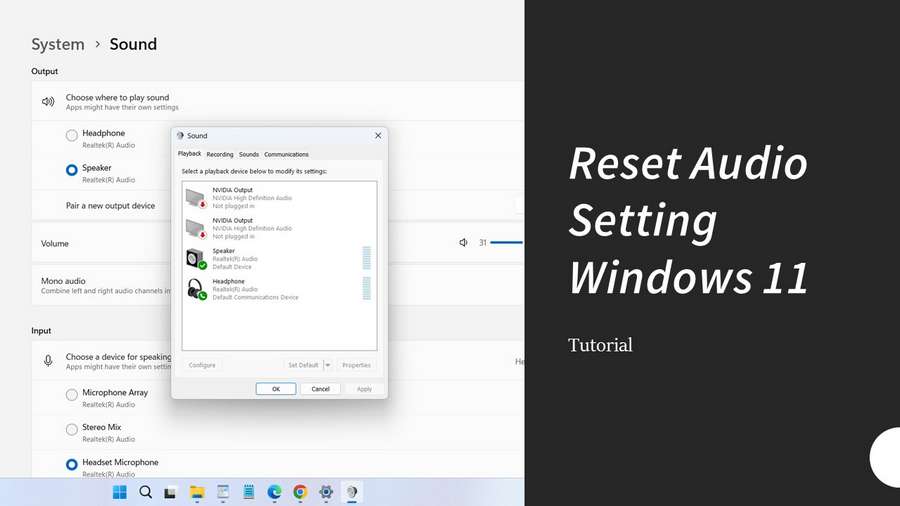
Sometimes we need to reset all audio settings of Windows 11 because there is a problem related to the audio inputs or outputs generated on the Windows 11 Operating System. Often after making changes to settings, updating software and drivers makes the audio in Windows 11 problematic. Problems that are often encountered are, noisy or not clear in microphone input sound, audio output that can’t be heard, or other problems such as decreased audio quality both audio input and output from before.
To solve the audio problem in Windows 11 there are actually several solutions to solve it. And it’s better if you don’t understand at all about Windows 11, it’s a good idea to be accompanied by someone who has experience in running with Windows 11 operating system to fix your operating system problems, audio problems are no exception. This is to avoid the risk of data loss or errors that cause your operating system to fail to run fully. But for those of you who are ready for the risks, here we provide a tutorial on how you can reset your audio settings in Windows 11.
How to reset all audio settings windows 11
Method 1 Reinstall Audio Driver Windows 11
The first method is to reinstall the Windows 11 Audio driver. This method often works and solves the problem of many people facing audio input/audio output in Windows 11 suddenly having problems.
Fortunately in Windows 11 we can do the audio driver reinstallation easily. Here you can follow the guide.
1. Make sure your Windows 11 is connected to the internet first and also make sure Windows update is on / not being paused or stopped forcibly using third-party programs because this process will require internet and also Windows update services.
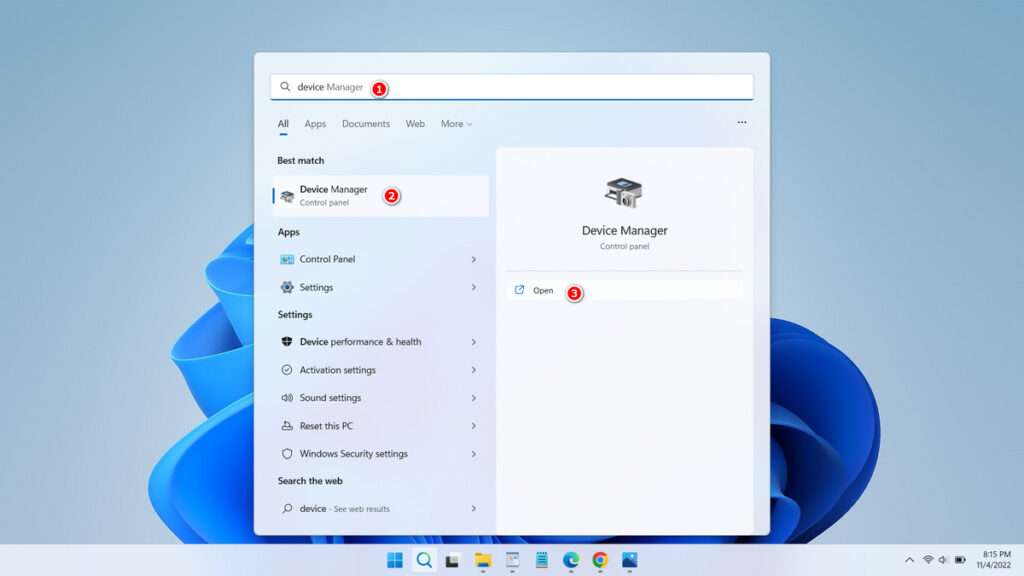
2. In the search box in Windows 11 type “Device Manager“, then you can open it by clicking “Open“.
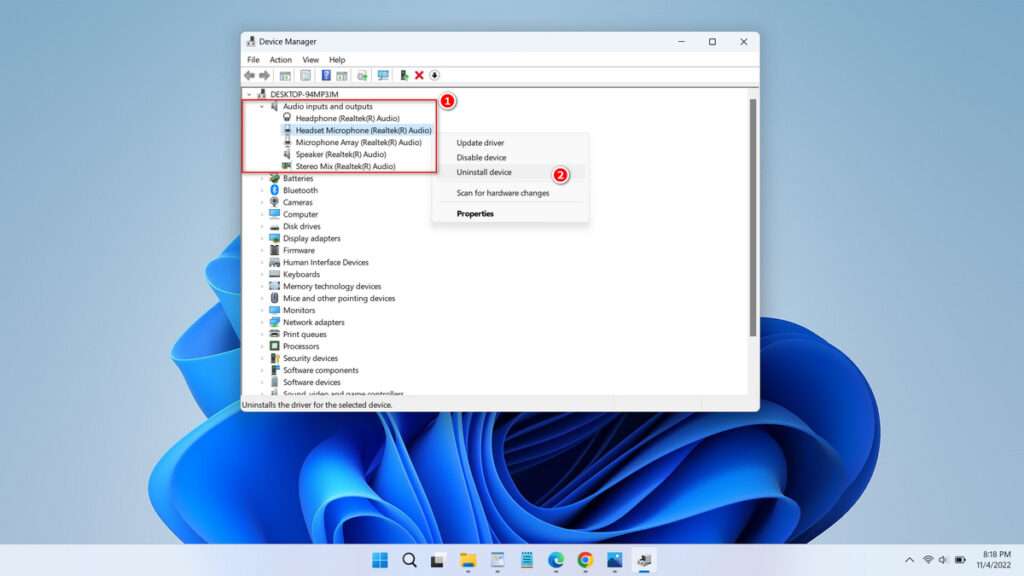
3. Please click arrow in the “Audio inputs and outputs” option, please uninstall all drivers / some drivers on the device that you value as problematic by right-clicking on the device name, then select “Uninstall device“, then click “Uninstall” button.
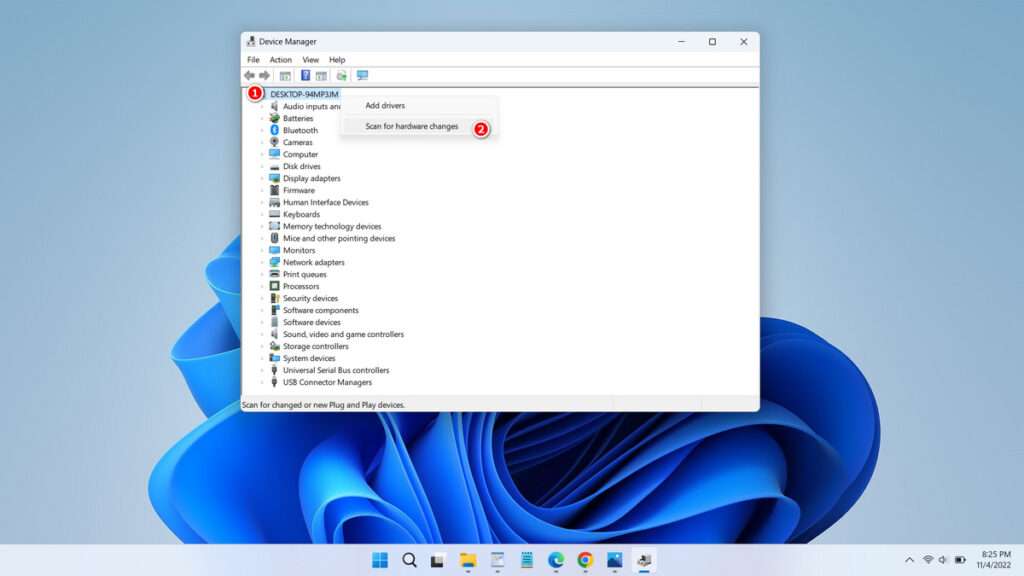
4. After all your problematic audio drivers are uninstalled, you can let Windows 11 reinstall the drivers by making sure Windows update is not off and Windows 11 is connected to the internet. To speed up the process of reinstalling your audio driver, you can right-click on your computer name then select “Scan for hardware changes” option, do it many times and wait until your audio driver is installed again, this step is to help speed up the process of reinstalling the audio driver in your Windows 11, and of course all audio settings will go back to the way they were/default.
Method 2 Using Audio Troubleshooting
Using audio troubleshooting can also often solve audio problems that exist in Windows 11. This is because sometimes we accidentally make incorrect audio settings and make the audio input/output problematic. To use audio troubleshooting follow this guide.
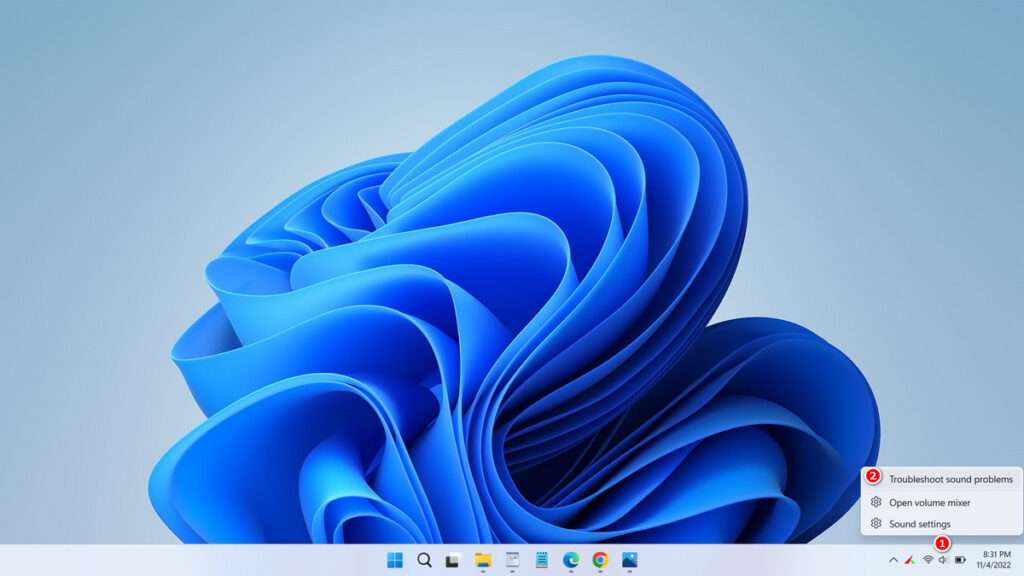
1. Right-click on the audio icon in the lower right corner of your Windows 11, then select “Troubleshoot sound problems“. Then select audio device that you suspect is having problems, then click “Next“.
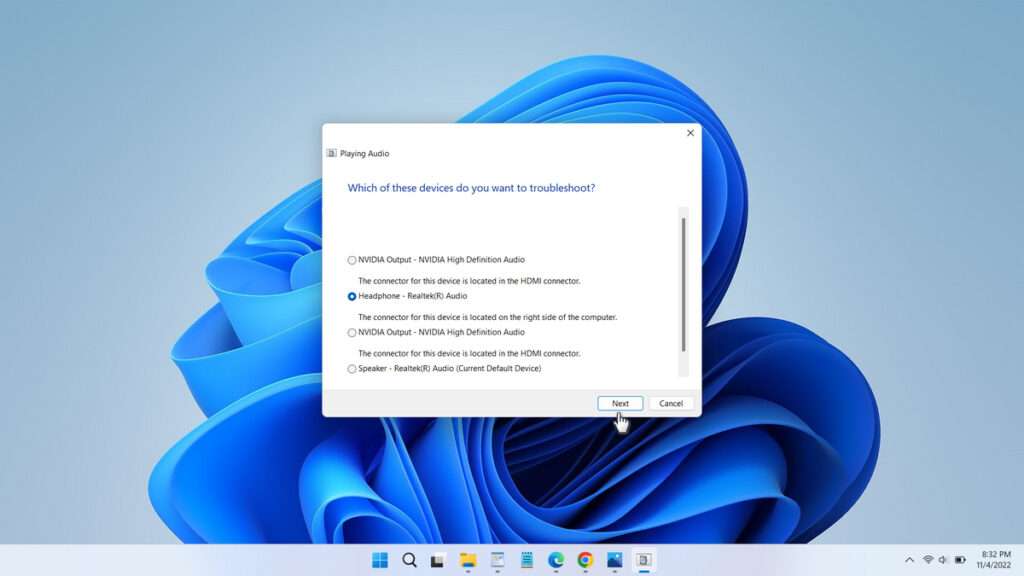
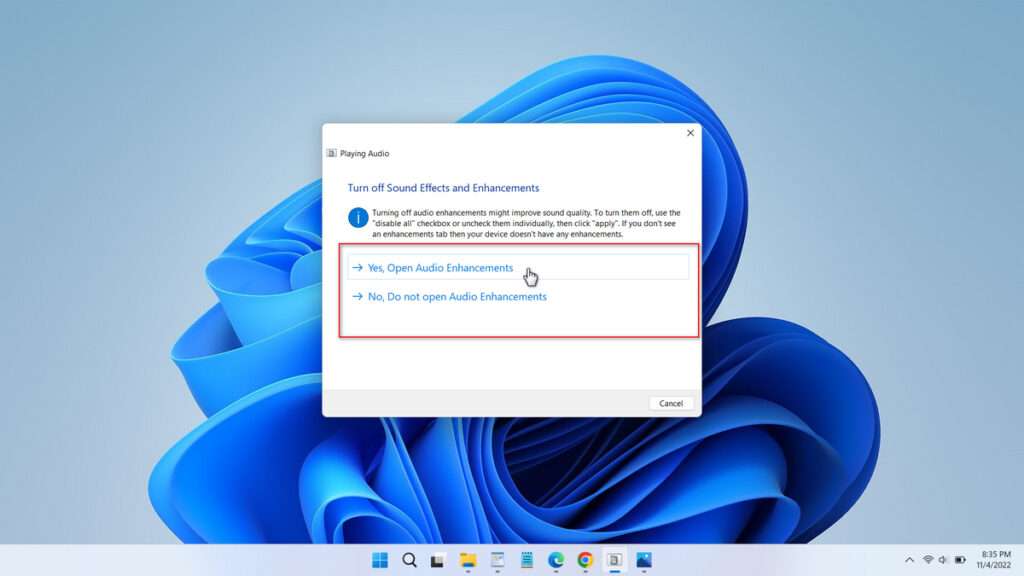
2. Follow the guide and select the option suggested by Windows 11 to try to fix the issue with your audio settings.
Method 3 Trying to perform the configuration manually
In addition to trying troubleshooting to solve audio problems in Windows 11, you can also try to configure audio settings manually. This is highly recommended especially for those of you who have experience using the Windows operating system.
Basically, Windows 11 has audio settings that are slightly different in appearance from previous versions of Windows. For this reason, it is important for you to learn these audio settings, so that in the future if there is an audio problem you will be easier to solve it independently. To try to perform manual configuration on audio settings in Windows 11 follow the following guide.
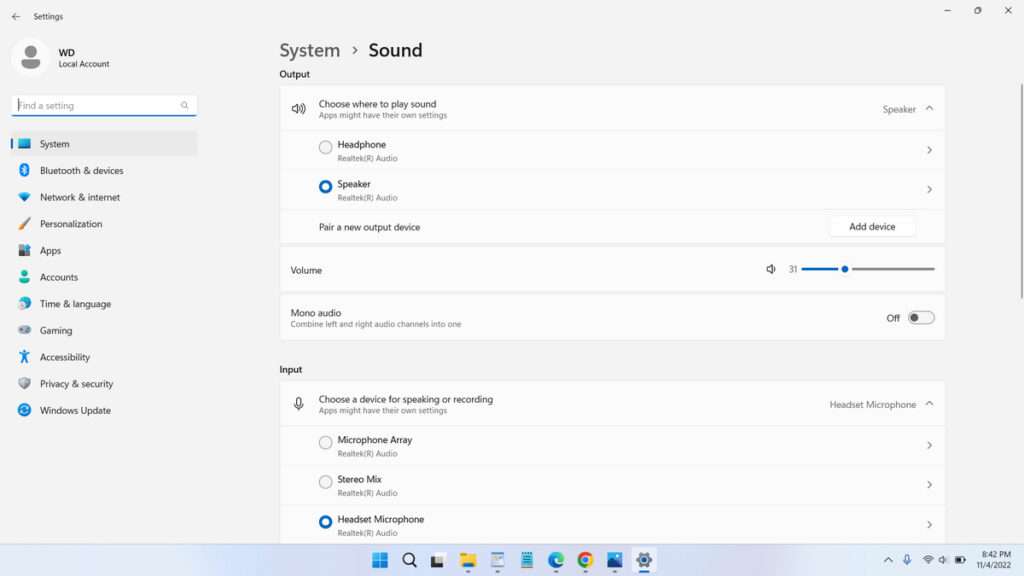
1. On your audio icon in the lower right corner of the Windows screen, right-click and select “Sound settings“.
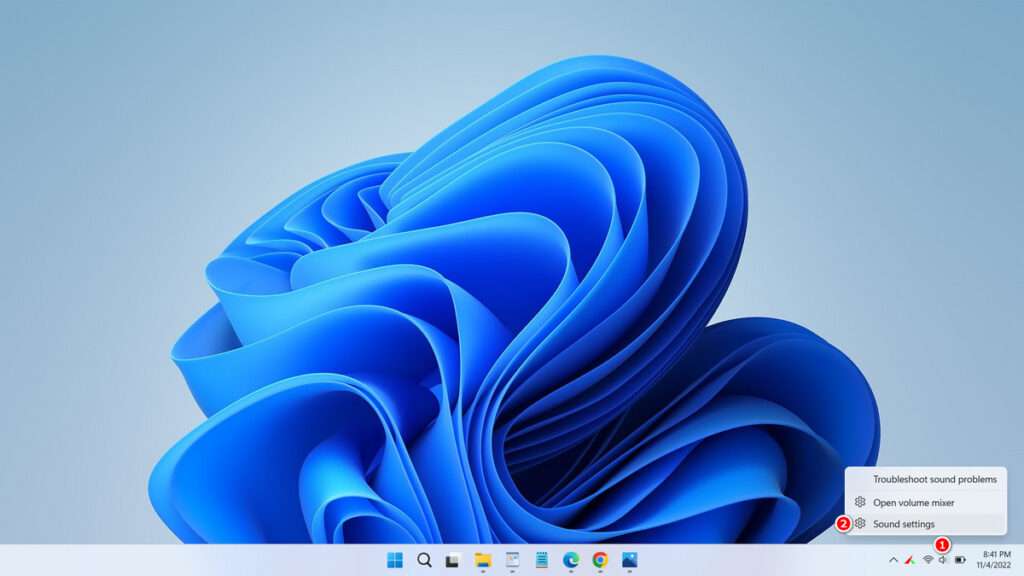
2. In this menu you can configure input and output audio on your Windows 11. These settings include voice control, volume control, channel format, audio enhancements, and selection of which devices you want to make input and output audio on. Please explore in this menu to try to solve audio problems in your Windows 11.
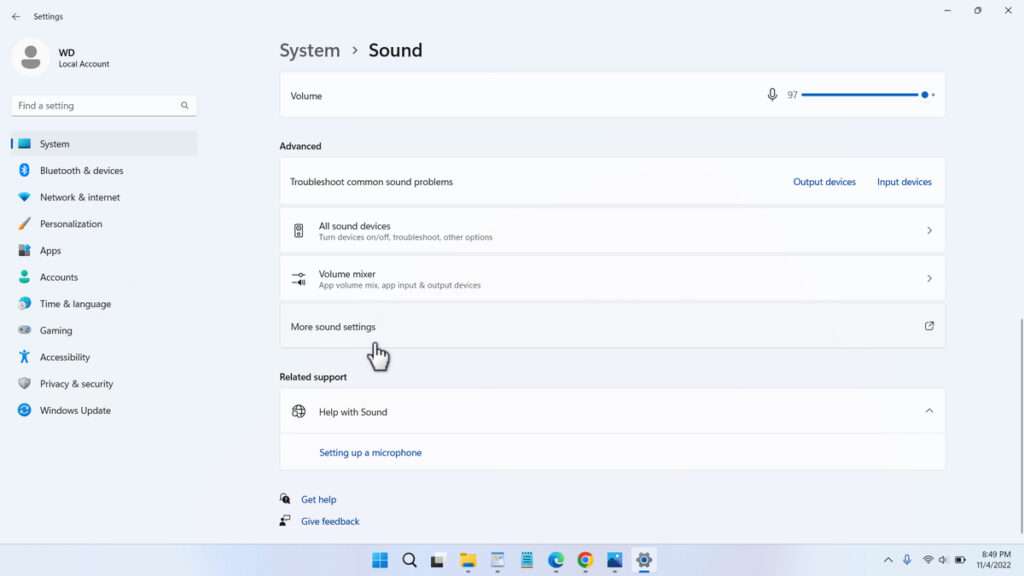
3. Then to make other settings such as making the default audio input or output, seeing the detailed list of audio drivers and devices installed in Windows 11, you can click “More sound settings” menu in the previous menu at the bottom, more precisely in the “Advanced” section, see the following image.
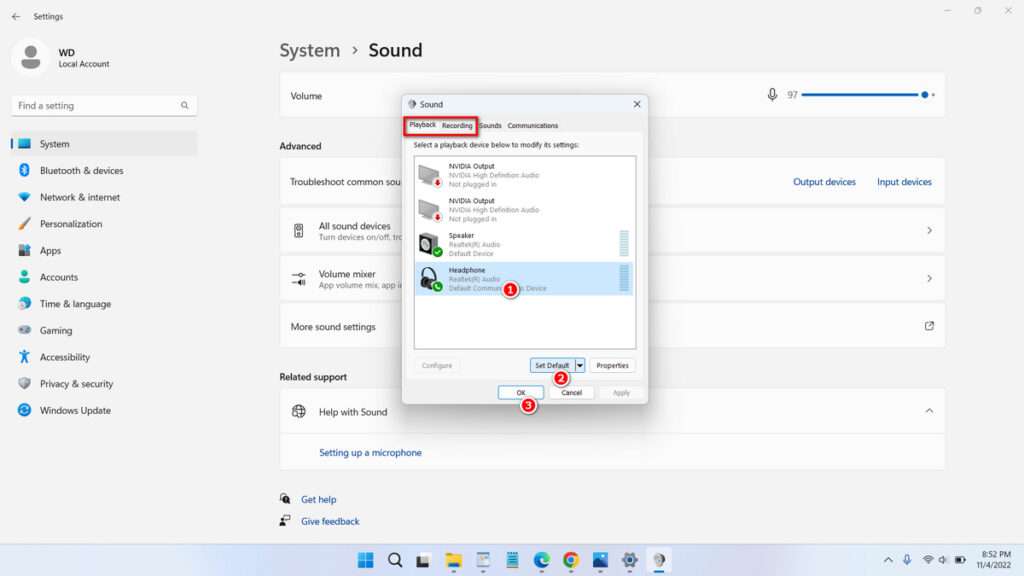
4. In this menu you can do a test run by selecting the default device for Playback (audio output) or Recording (audio input). It is often found that the settings here are not correct so that sometimes the audio can’t come out, not as clear as usual and so on because of the incorrect selection of audio devices for input and output. Try overriding this setting to try if this resolves the input/output audio settings issue in your Windows 11.
That’s the tutorial how to reset all audio settings on windows 11. This method may work on some people and not on others. But as a note, the most important thing is that you have to install the audio driver with the correct version to get the best results for audio quality in your Windows 11. Here we provide some tips on how audio settings in Windows 11 can be reset in the form of video.

