Some of you who have an interest in having to activate the Hyper-V feature on the Windows 11 operating system may ask how to see if Hyper-V has been activated or not on your operating system.
Actually, to check Hyper-V is active or not, the method is very easy and of course there are many ways to do it. But before we show you how you can find out whether your Hyper-V is active or not, it would be nice if you first know what Hyper-V is.
What is Hyper-V?
Hyper-V is a technology that will allow you to create a device virtually, easily you will be able to have a computer in a computer that is usually called a guest computer. This guest computer will not interfere with the configuration of the original computer or operating system of your device, so Hyper-V will be very beneficial to be used to test certain things that have the potential to damage the configuration so that your host computer or original computer will be safe by utilizing Hyper-V by creating a virtual machine.
How to Check Hyper-V is Active?
Going into the main discussion after our title, how exactly to check whether our Hyper-V computer is active and can be used to create a Virtual machine.
1. Via BIOS
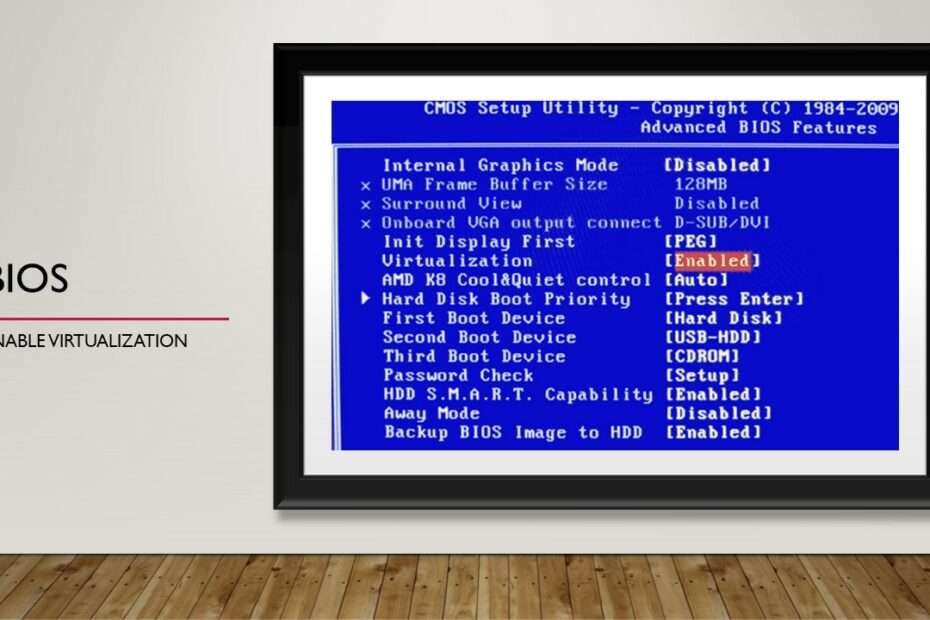
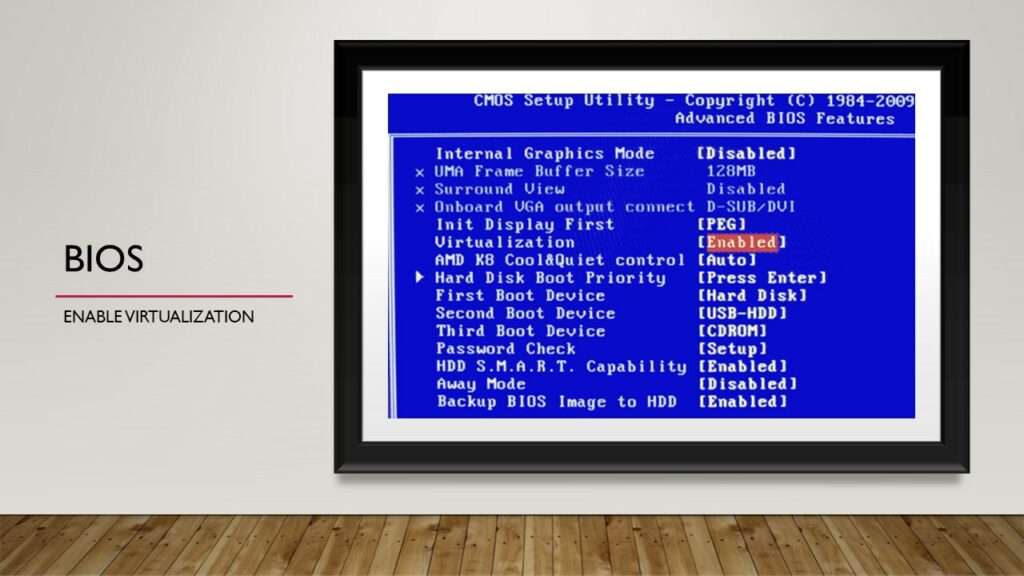
Bios is a setting that is found in all computer hardware, and we can enter the computer Bios when the computer is just started and you press certain keys according to your hardware type, usually in general the key pressed when the computer boots or just turned on to enter the Bios is F1, F2 or F10, adjust to your hardware type.
After that you can see the Hyper-V settings in your BIOS, usually this menu is in the configuration and with names that are different ages, usually there are words virtualization, VTX, and so on. Try to find out based on the specifications of your hardware or computer. After meeting, make sure the setting is active or in “Enabled” mode.
For example, the picture below is a BIOS with Virtualization or Hyper-V that has been enabled or enabled.
2. Via Command Prompt
By using Command Prompt you will also easily be able to see whether Hyper-V has been enabled or not. The method is as follows:
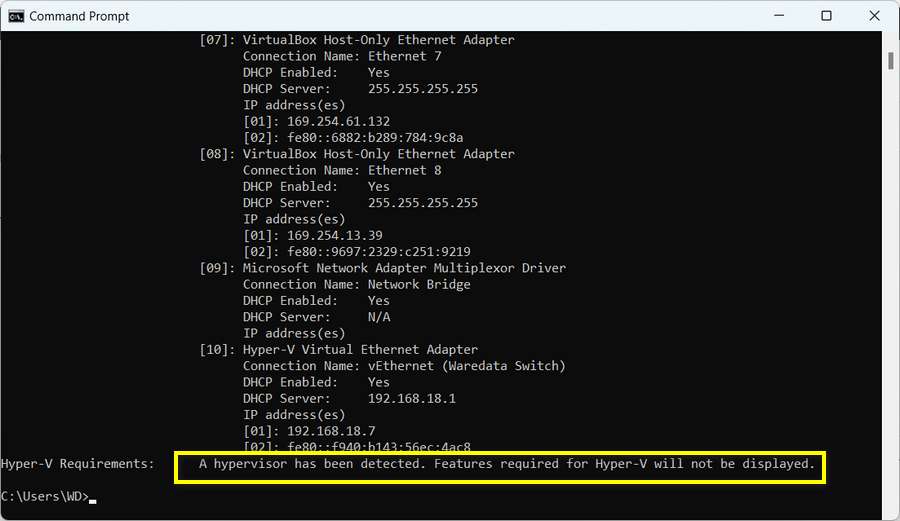
a. Open Command Prompt by typing in your Windows search box “Command Prompt“, then open the application.
b. Once the app opens, please type “systeminfo” and press enter.
c. Scroll to the very bottom, see there is information about Hyper-V Requirements. If it has been detected means that your Hyper-V is active, see the following figure.
3. Via System Information
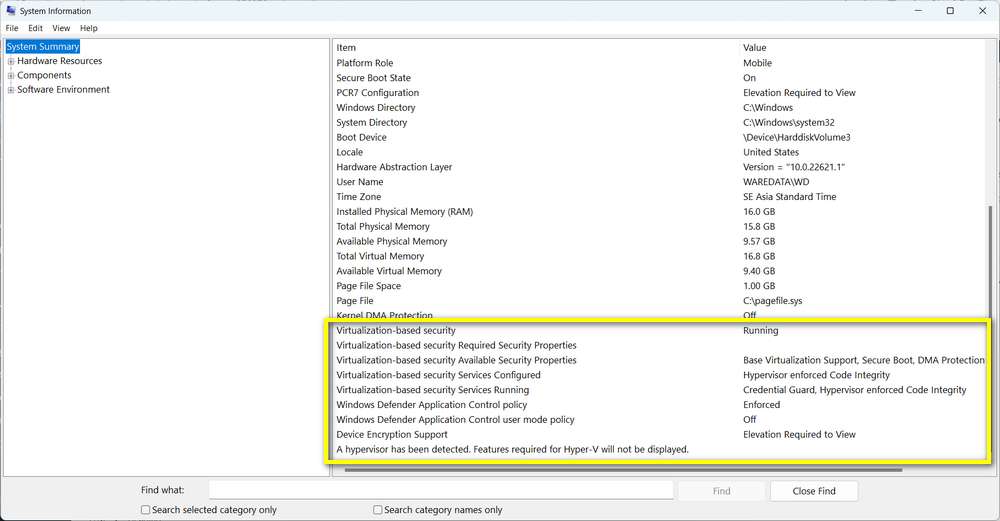
System Information is a feature to see configuration details and features on your device. Starting from Windows 10 to Windows 11 this feature is very easy to open, you just type “System Information” in your Windows search box, and open the application.
In the System Summary section, on the right side of the bottom there is complete information about Hyper-V. There you will be able to see whether Hyper-V is active or not, there is even information there your Hyper-V has been running or not. See the picture below.
4. Via Control Panel
Via Control panel you can check whether Hyper-V is active or not. Open Control Panel in your Windows, just type it in Windows search the open it, then select “Programs” > “Turn Windows features on or off“. Then see if Hyper-V has been checked or not. Take a look at the picture below.
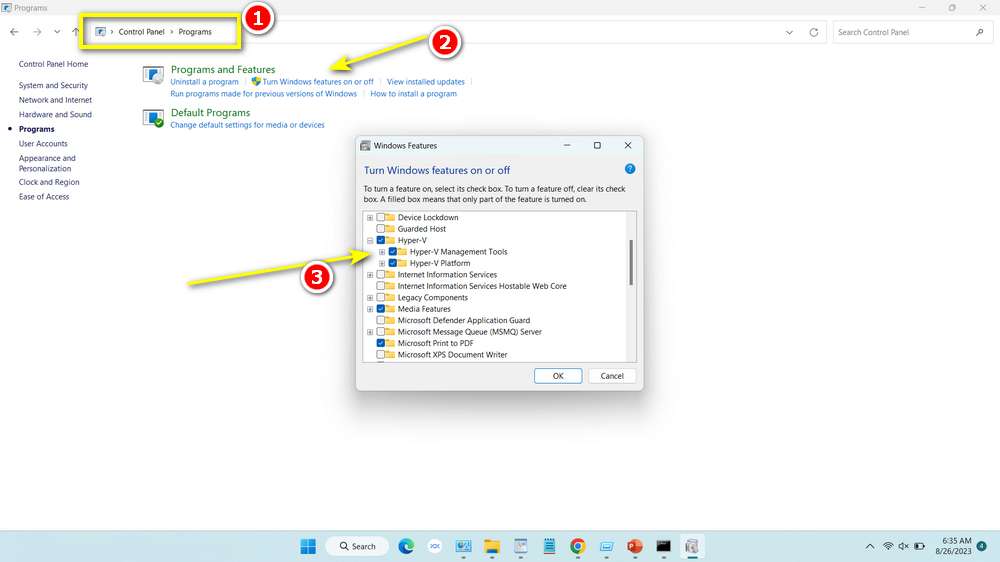
That’s a complete guide on how you can check whether Hyper-V has been enabled or not. You can also see the guide in this video.
Maybe you also liked the following other articles?

